Adjusting the Automatic Brightness Stabilization (ABS) on your OEC 9800 is actually a fairly simple process. Our guide will walk you through each step as well as provide some context for what KVP readings are in spec.
Preparation For Adjusting The ABS
1. Remove the Camera and Can Covers
2. Prepare Your Tools and Materials
1. Take an Initial Exposure with One Sheet of Copper
2. Adjust the KVP Using the Set Screw
4. Verify with Additional Copper Sheets
NEED NEW OEC PARTS NOW?
We can have them shipped to you same day!
When you request a part, it goes immediately into our queue, where our service reps process those requests from 8am to 8pm EST. Once processed, we give the part and packaging a final inspection before shipping.
Preparation for adjusting the ABS
1. Remove the Camera and Can Covers
Start by removing the camera cover.

Once the camera cover is off, remove the can cover to access the camera.

2. Prepare Your Tools and Materials
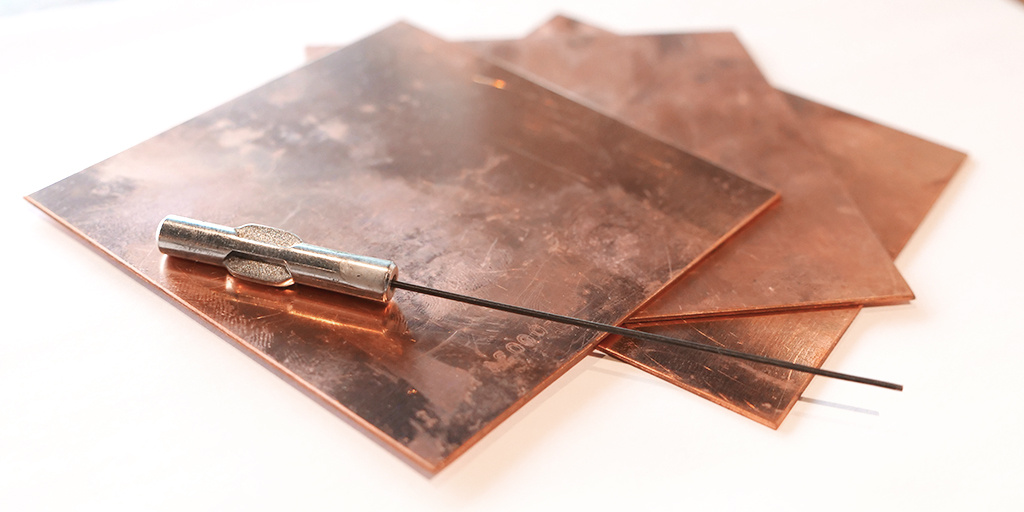
You’ll need a six-flute spline tool and three sheets of 1mm thick copper for this adjustment. Keep them handy as you proceed.
Note: We're using the 9961 (0.048" head) Bristol 6-Flute Mutile Spline Screwdriver Blade, 0.048".


The Adjustment process
1. Take an Initial Exposure with One Sheet of Copper
Place one sheet of copper over the X-ray tube and take an exposure. Check the kVp reading. In this example, the kVp is 63, which is within spec, but we’ll adjust it slightly down to 61.

2. Adjust the kVp Using the Set Screw
Plug in either your hand switch or foot switch. With the hand switch in one hand, use the six-flute spline tool to loosen the set screw at the very top of the camera on the fully open stop.

While taking an exposure, rotate the small gear near the set screw to lower the kVp reading. Adjust until the kVp reads 61. Once it’s correct, tighten the set screw securely. Ensure it is snug against the post on the right-hand side.

Note on the Specs for 9800/9900: 1mm copper is 61 +/- 3 kVp, 2mm copper is 71 +/- 3 kVp, and 3mm copper is 79 +/- 3 kVp.
3. Verify the Adjustment
Take another exposure to confirm the adjustment. If the kVp still reads 61, the adjustment is successful.

4. Verify with Additional Copper Sheets
Place a second sheet of copper over the tube and take another exposure. Check the kVp reading:
- If it reads around 70, it’s within spec, and you can call it good.
Next, place a third sheet of copper and take one final exposure.
- If it reads around 77, it’s still within spec, even if slightly low. Adjust further only if necessary.
5. Final Confirmation
Ensure all exposures are within spec and that the adjustments meet your desired values. Once complete, reassemble the camera and can covers.
NEED HELP WITH SERVICE?
If your team doesn't have an in-house biomed or clinical engineer, our service team is ready to dispatch qualified personnel to install your batteries or see to any other service needs you have.
Contact Us
Matt Lenart
Matt Lenart is a C-Arm Engineer at Block Imaging. Matt travels to customer sites to perform preventative maintenance, repairs, and troubleshoot C-Arm equipment issues. When he’s not turning the wrench Matt can be found spending time with his family, enjoying a craft beer, and cheering on THE Ohio State football team.

