So, you’ve spent the past couple months poring over site drawings and working through construction issues and your site prep work has paid off: you're ready to accept delivery of your new CT scanner and begin installation!
As you move into this next phase of your CT scanner project, we want to help you know what to expect. Keep reading for more details on what exactly takes place during a CT scanner installation.
Install Crew Arrival
Installation typically begins with a 2-man crew, arriving early on the scanner's delivery date. They may bring their tools with them or, for installations especially far from their home office, they may ship a crate of tools to your facility. In the latter case, you'll be notified to be on the lookout for the crate a day or two before the installation start date. Your installer may also request a secure space to store tools and equipment during the course of the installation.
Shortly after arrival, your install crew will confirm that the system's entry path is clear of obstruction and prepare it with protective floor covering as needed.
Delivery of the CT Scanner
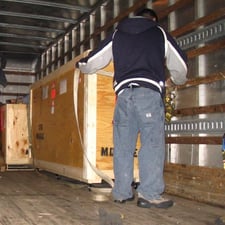 When the truck arrives, the installers will accept and sign for it as well as assist with unloading. Depending on the layout of your facility, this may include blocking off several parking spaces to ensure access and adequate maneuvering space. Once the system is off the truck, the installers will take it into the building.
Mechanical Installation
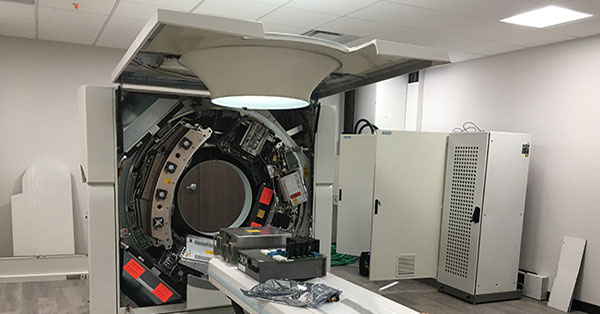
The first phase of the actual scanner setup is the mechanical side of things. This involves unpacking all the components, running all of the cables, positioning the table and gantry, and mounting them permanently. Please note: At some point during this process you'll need to have an electrician on site to connect the system to your facility's power. We recommend contacting them in advance and having them tentatively "on call" during the first day or two of your scanner's installation.
When the mechanical installation is complete, all tools and supplies will be packed up and removed. All packaging materials will be disposed of, and the room will be swept clean. The mechanical team will also wipe down the scanner itself to remove any dust left over from the shipping or installation processes.
System Calibration
During the final day of mechanical installation, a calibration engineer will arrive to begin calibrating the system to OEM specifications. This engineer will also see to any challenges that may arise during this time to ensure a fully functional, patient-ready scanner.
When calibrations are complete, the engineer will walk you through the unit, showing you the components and basic operation. We refer to this as a "system demonstration of use". This general tutorial should not be confused with the more intensive courses commonly known as "applications training". For further clarification on the distinction, and to help determine what level of training you and your team may need, you can refer to our earlier article: Imaging Equipment Applications Training vs. System Demonstration of Use
 Documentation
The last step for your install crew is the paperwork. The calibrating engineer will fill out the required form, FDA 2579, and leave a copy on site for your records. Click the sample at the right for a closer look.
You may also be asked to sign a form indicating that the installation has been completed to your satisfaction and that you have accepted the system. It is recommended that you keep in touch with your project manager for an estimated time of completion so the appropriate team member(s), with the appropriate knowledge and authority, can be on hand to conduct a final inspection as well as sign for system approval.
Next Steps
When the installation is complete, there are a variety of next steps depending on how you purchased your system. If you'd like a little guidance, you can find help here: Medical Equipment Installation: What to Expect Post-Install.
If you have other questions that we haven't covered here, we're ready to help you get the answers. You can contact us here or use the button below to describe your project needs.

Kenn Dextrom
Kenn Dextrom is the Director of Product Manager at Block Imaging. He aims to provide clear direction and careful planning for Interventional Cath Lab buyers and working with the Block Imaging product team to provide excellent solutions for our customers. Out of the office, he spends most of his time keeping up with his wife and their three energetic sons.


